

Second Take
I am so excited to share this: I finished the second of the two projects I have been working on.
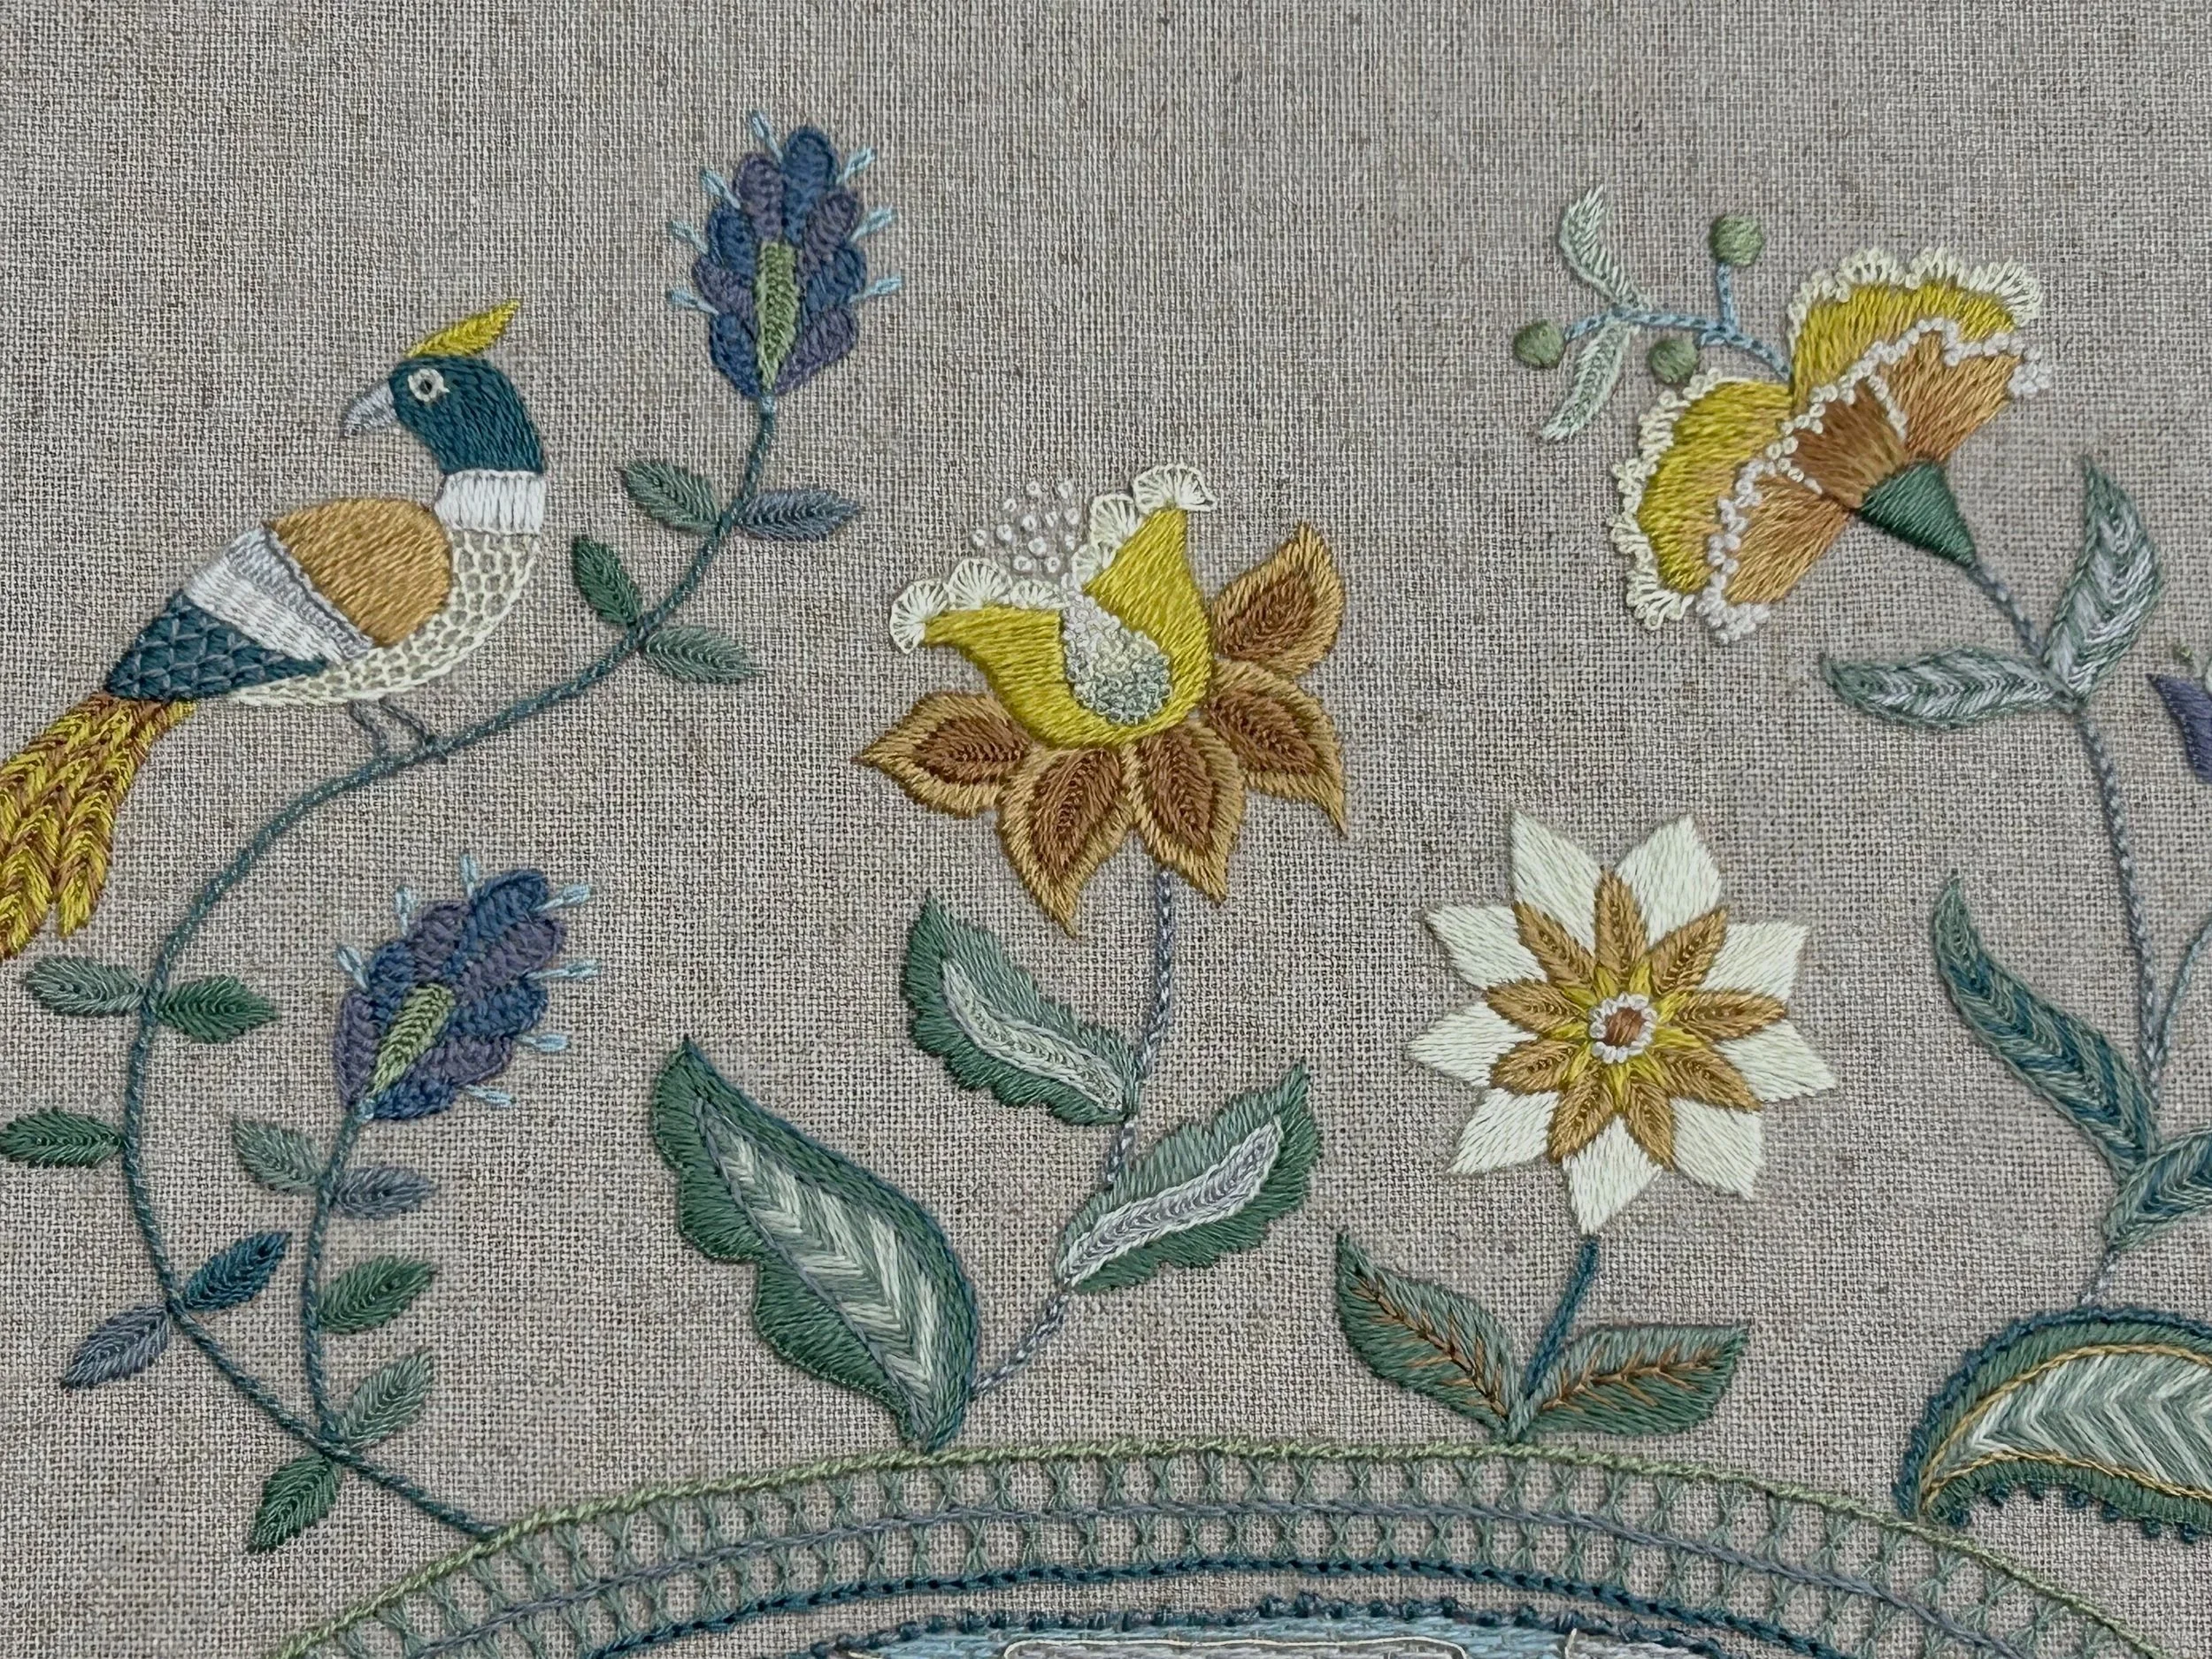
This time: Same flowers, same bird, but smaller and stitched in silk with flowers lined up to form a border.
If you missed the introduction to this (or these) projects, you can read my previous post here: Take Two – Part One.
I don’t know about you, but if there is one thing I really don’t like, it is doing anything twice, and I was a little worried that I would get bored when I set about stitching the second version of this design.
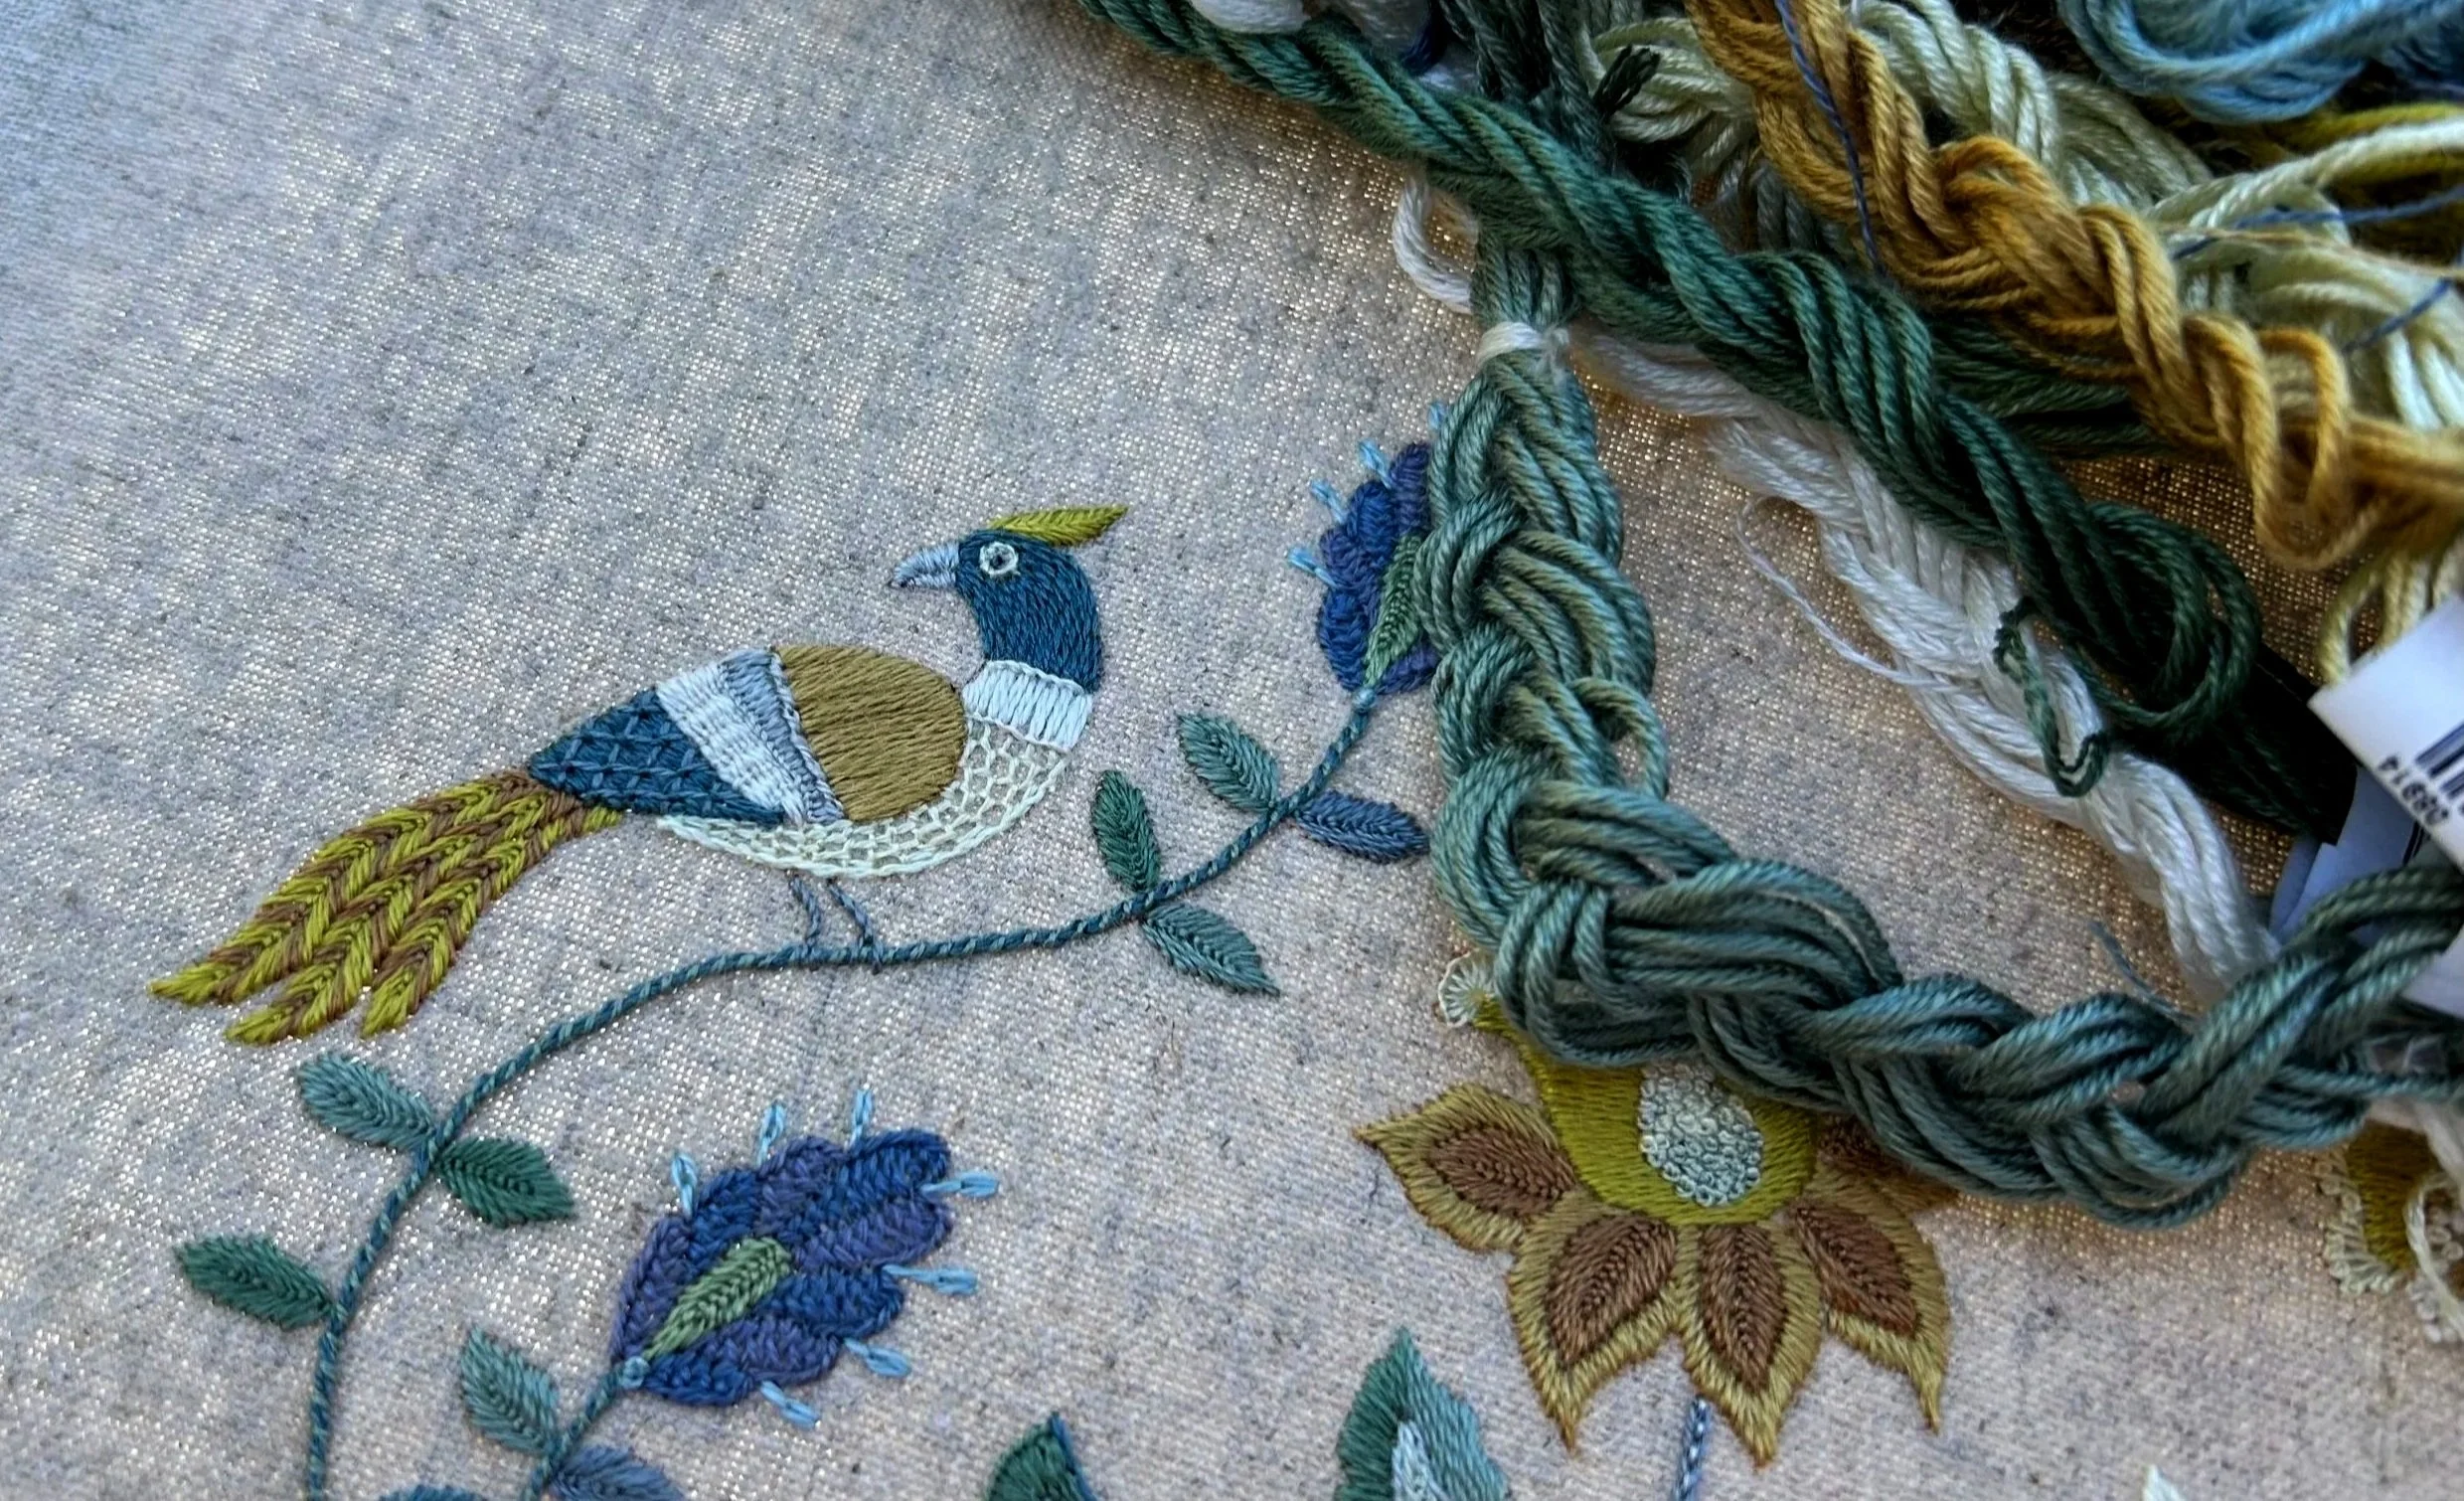
I left the bird to last. The colours are completely different to the wool version. I still think the tail is a little ‘busy’ because of the dots formed by the close fly stitches. Perhaps I will re-stitch it in fishbone stitch.
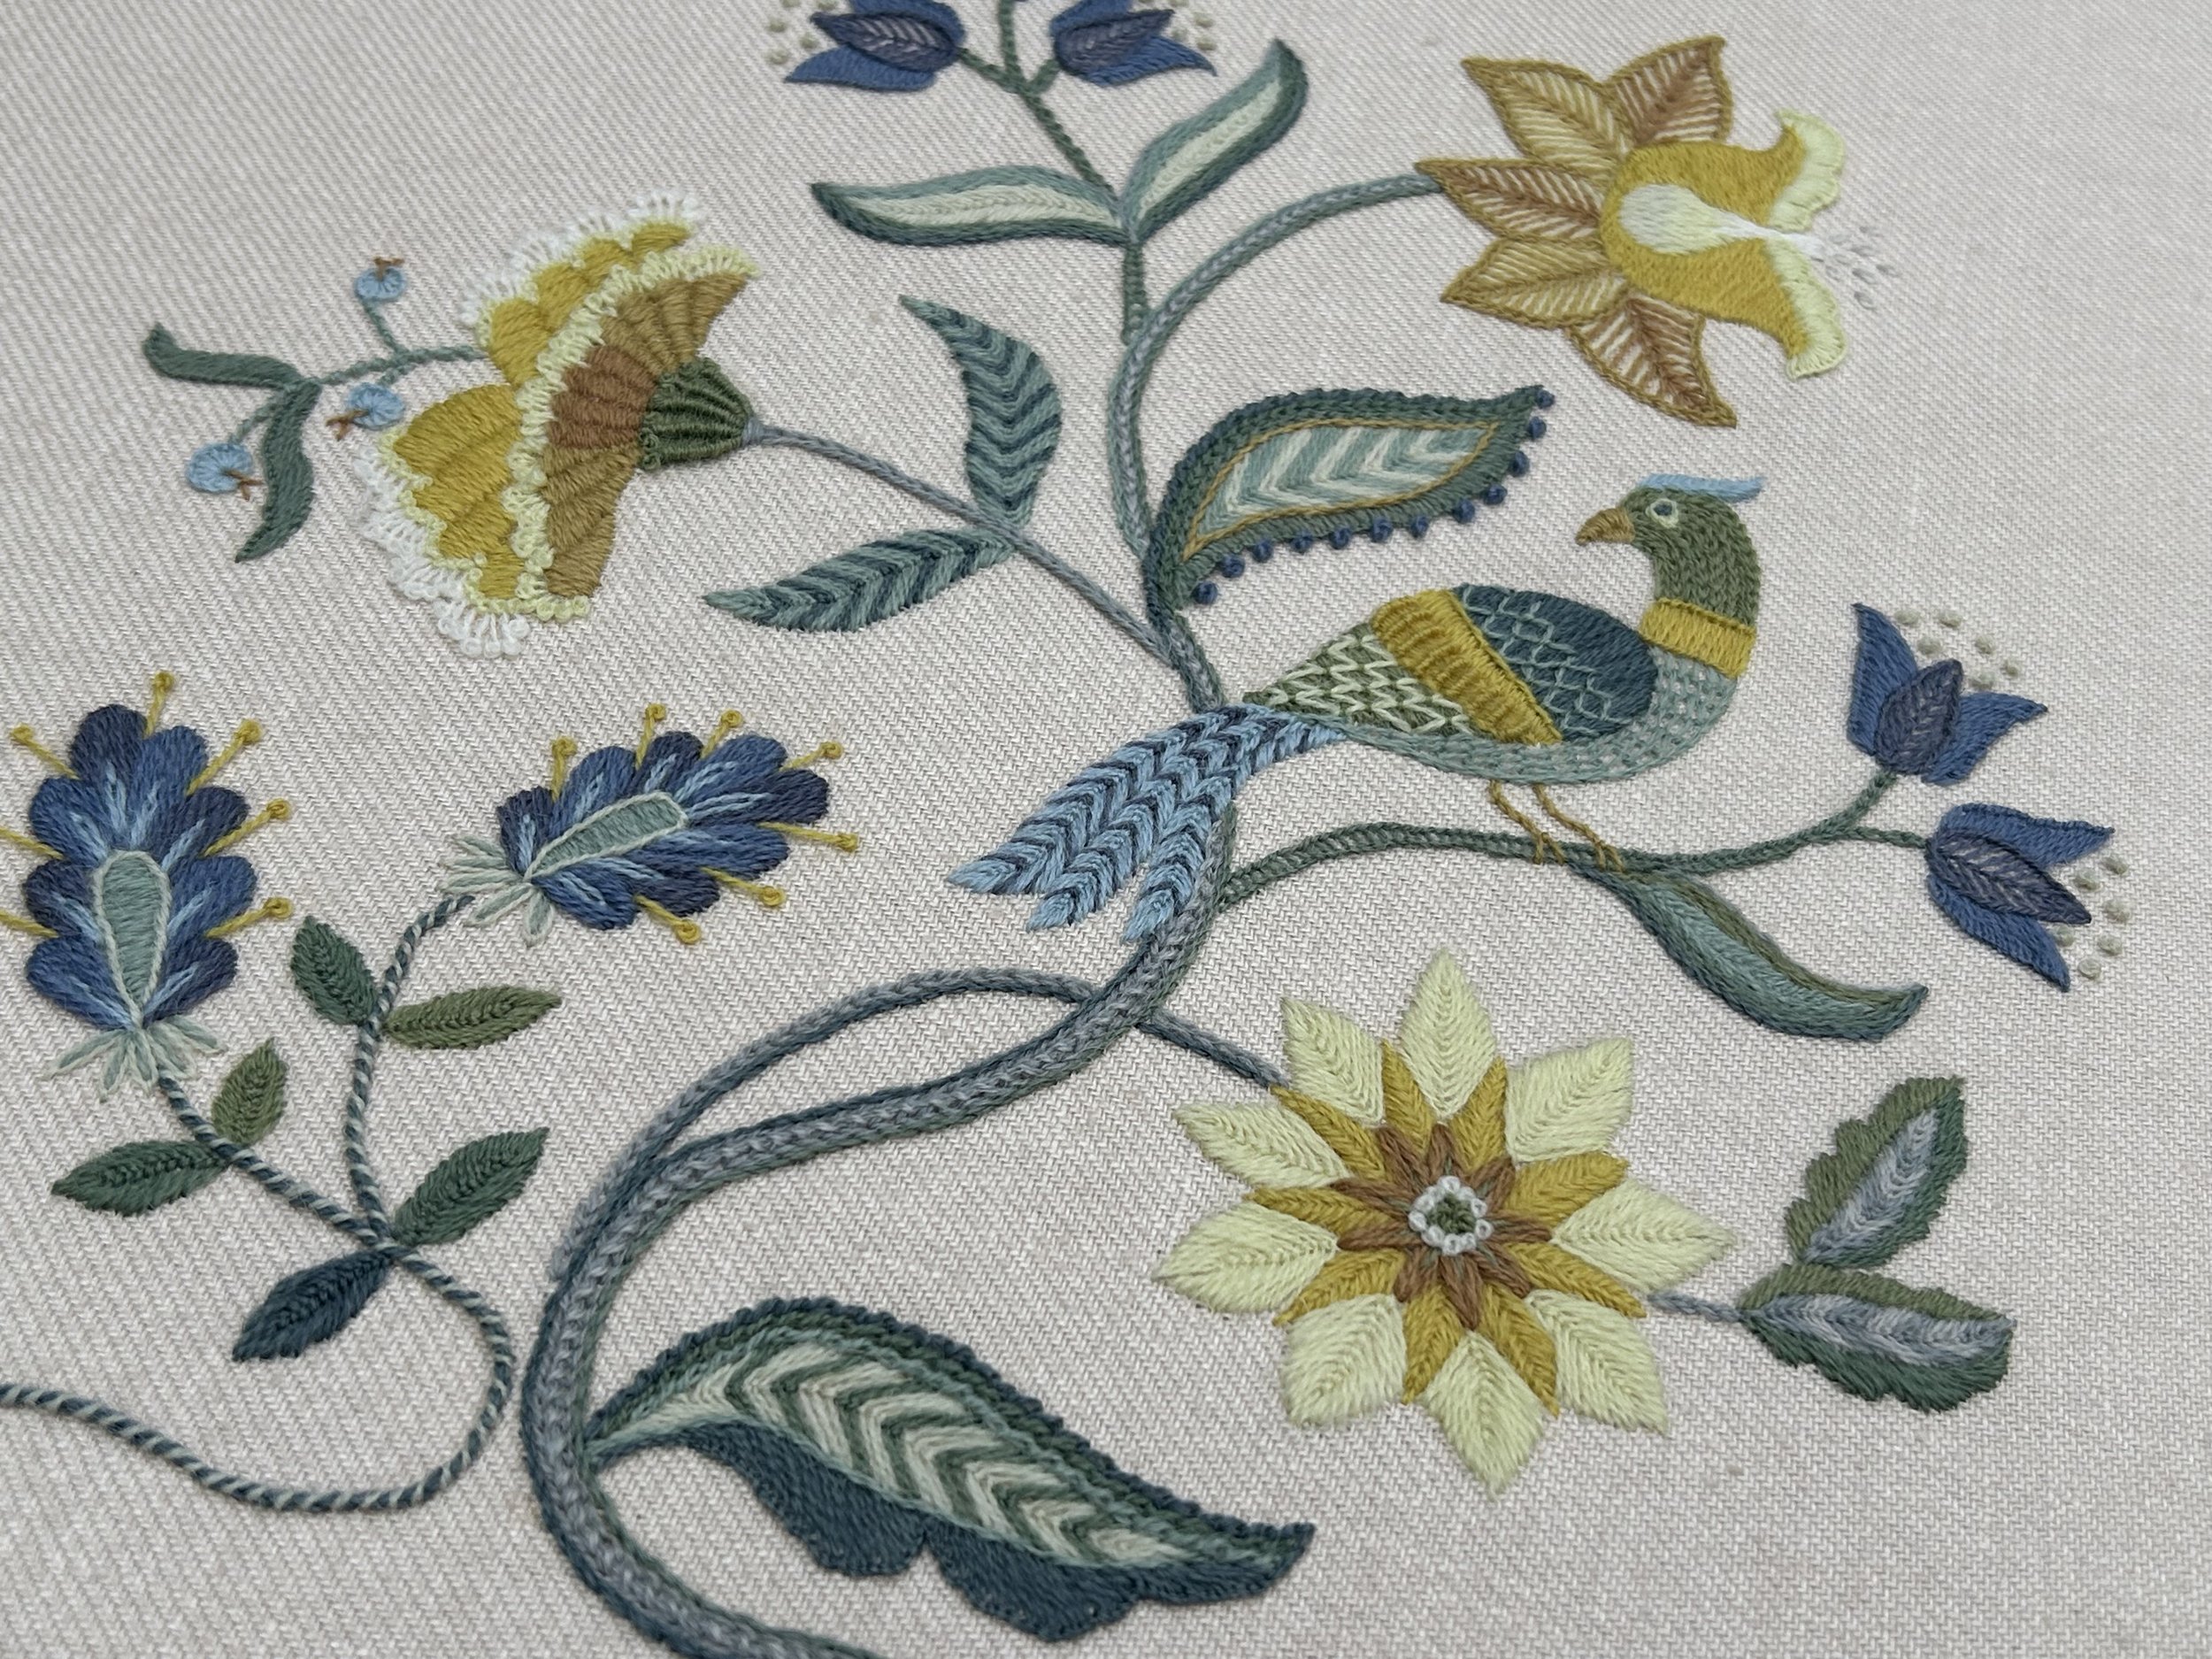
I am happy to say it has not been the least bit boring – and likely not the last time I will do a project like this. It has been so interesting to watch the silk version of the Take Two project come together under my needle. In fact, instead of being a tedious chore to repeat the embroidery, it was exciting. I think that because I was using silk, a completely different type of thread from wool and changed or adapted the stitches I used to suit the silk, rather than feeling repetitive, it was exciting to finish each part, to see how different it turned out.
Same flower - two versions.
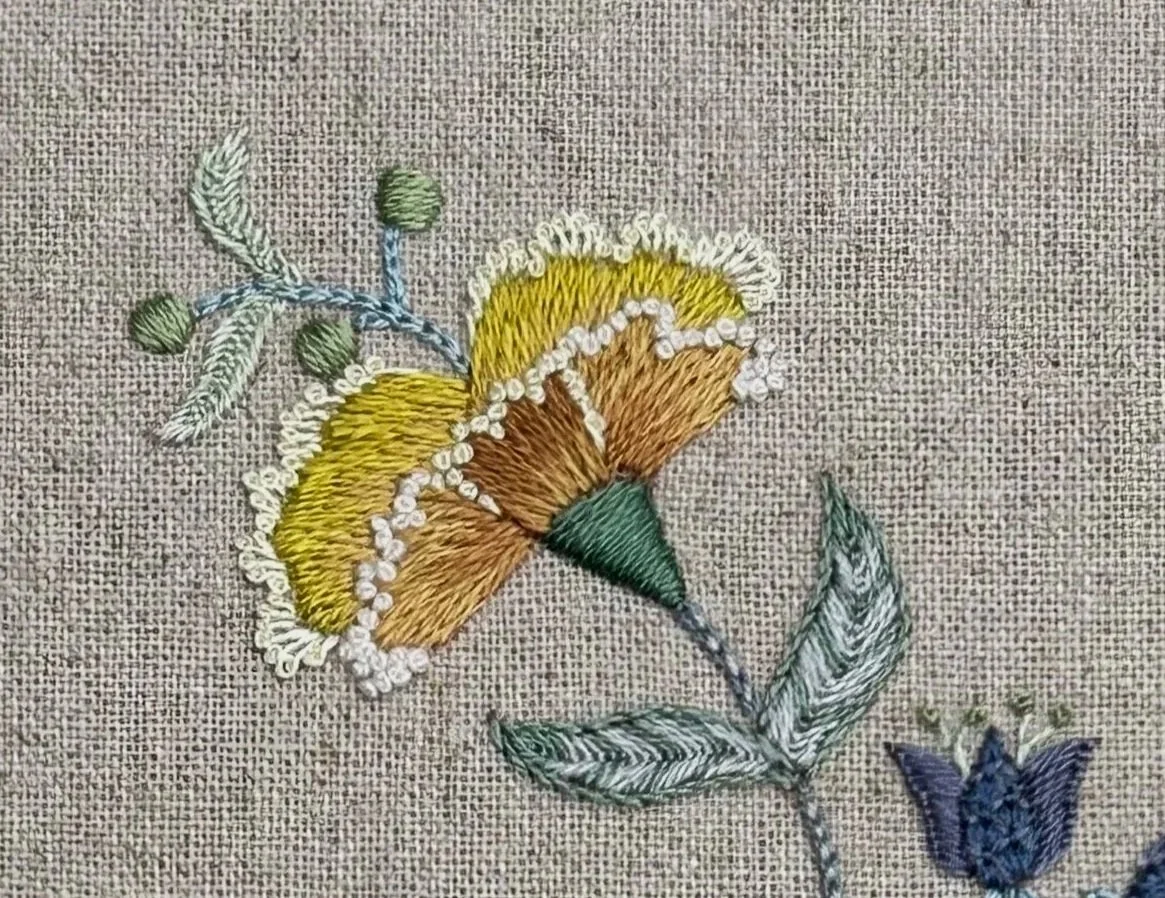
I think of this flower as ‘the carnation’. It kind of has that flouncy petal look.
Silk:
This one has long and short stitch petals, with a pistil stitch and French knots along the edges. The calyx (base) and the seeds are padded satin stitch.
I just have to use padded satin stitch when using silk. I just love the shiny, domed shapes.
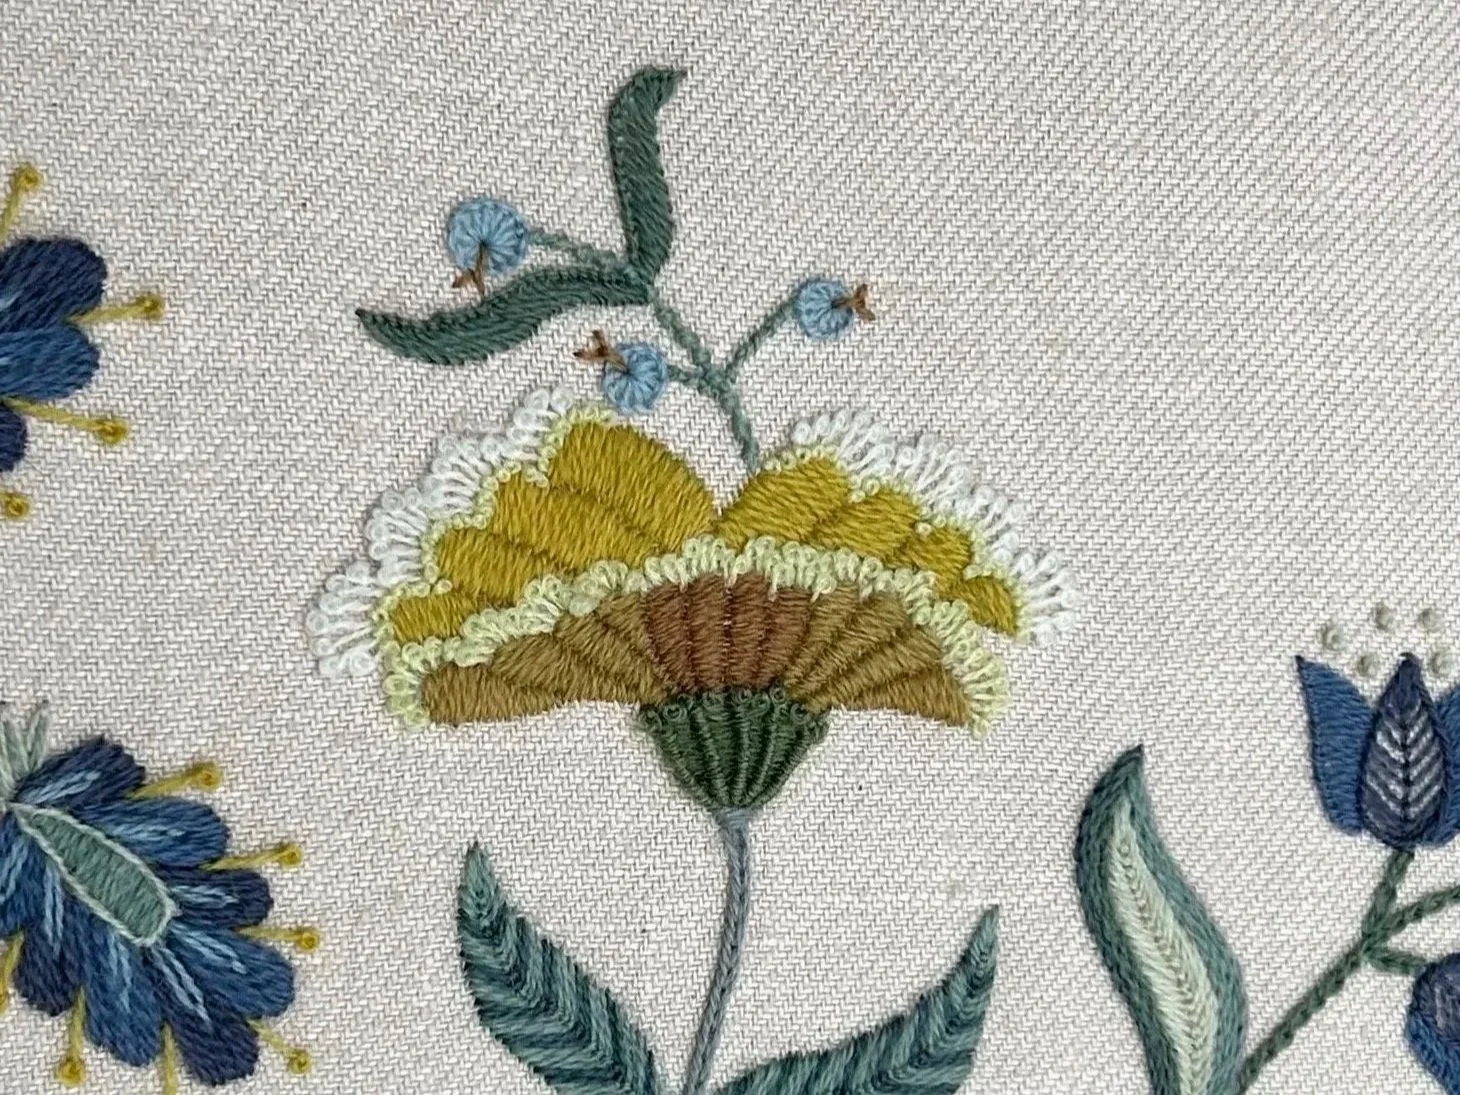
Crewel wool:
Same flower stitched in crewel wool using the same colours for the petals, but different stitches.
Satin stitch for the petals, embroidered in segments. Again, pistil stitch and French knots along the edges.
I like how the pistil stitches, placed side by side, form a kind of lacy edge.
The calyx is whipped back stitch, which forms ridges across the shape to mirror the segments on the petals.
It is so interesting how not only the scale, but the choice of stitches will alter the look of a flower.
Wool and silk are by far my favourite types of thread. They are very different to work with and look completely different when stitched up. Crewel wool, by nature, is matt, and the yarn's loftiness allows for fabulous textures across surfaces. Silk is the exact opposite: soft and shiny – the perfect choice for smooth surfaces, and the light reflected on the stitches adds to the piece's luxurious look.
I know these things, but I have never tested them out by stitching the same design in both fibres. I must say I had a lot of fun doing this, and I am so happy with the results.
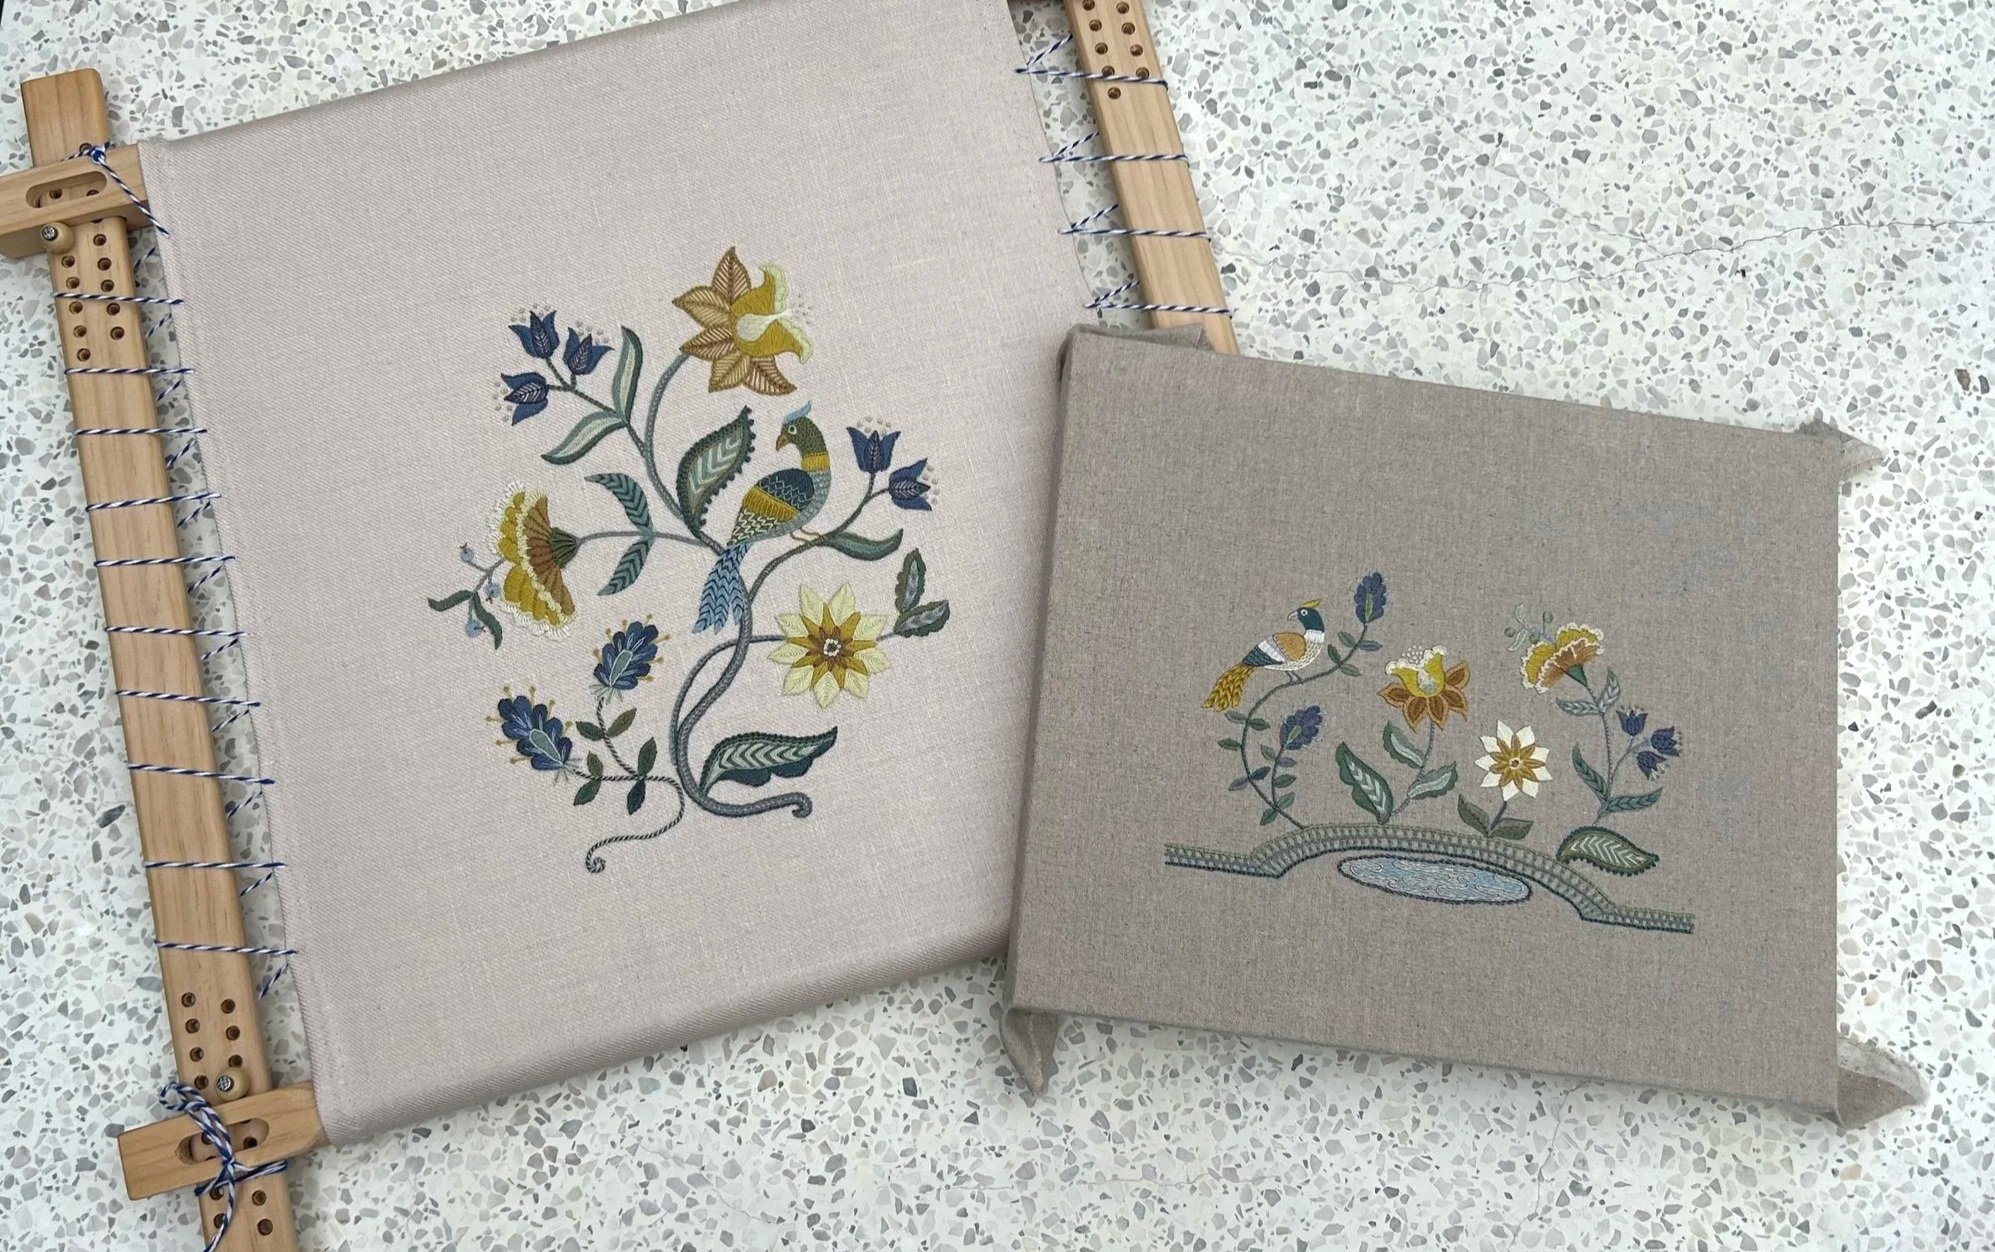
TAKE TWO: The crewel embroidery and the silk embroidered border. Same flowers, same bird, just arranged differently. I really would love to stitch the border design in wool - if only I had time…
What I learned (stitch geek warning :-)
This little experiment confirmed the things I mentioned above about the difference in appearance between silk and wool. But I guess one thing is knowing something, another is actually being able to see it side by side. For instance, I stitched several leaves in the wool projects using fly stitch.
I am a little obsessed with stitched stripes at the moment. Leaves, petals, tails… they all get the stripy treatment.
In silk, the centre line created by the tying down stitches made these shapes look too busy – especially when the leaves were striped, so I changed these to fishbone stitch, which forms a flat ‘seam’ down the centre of a shape.
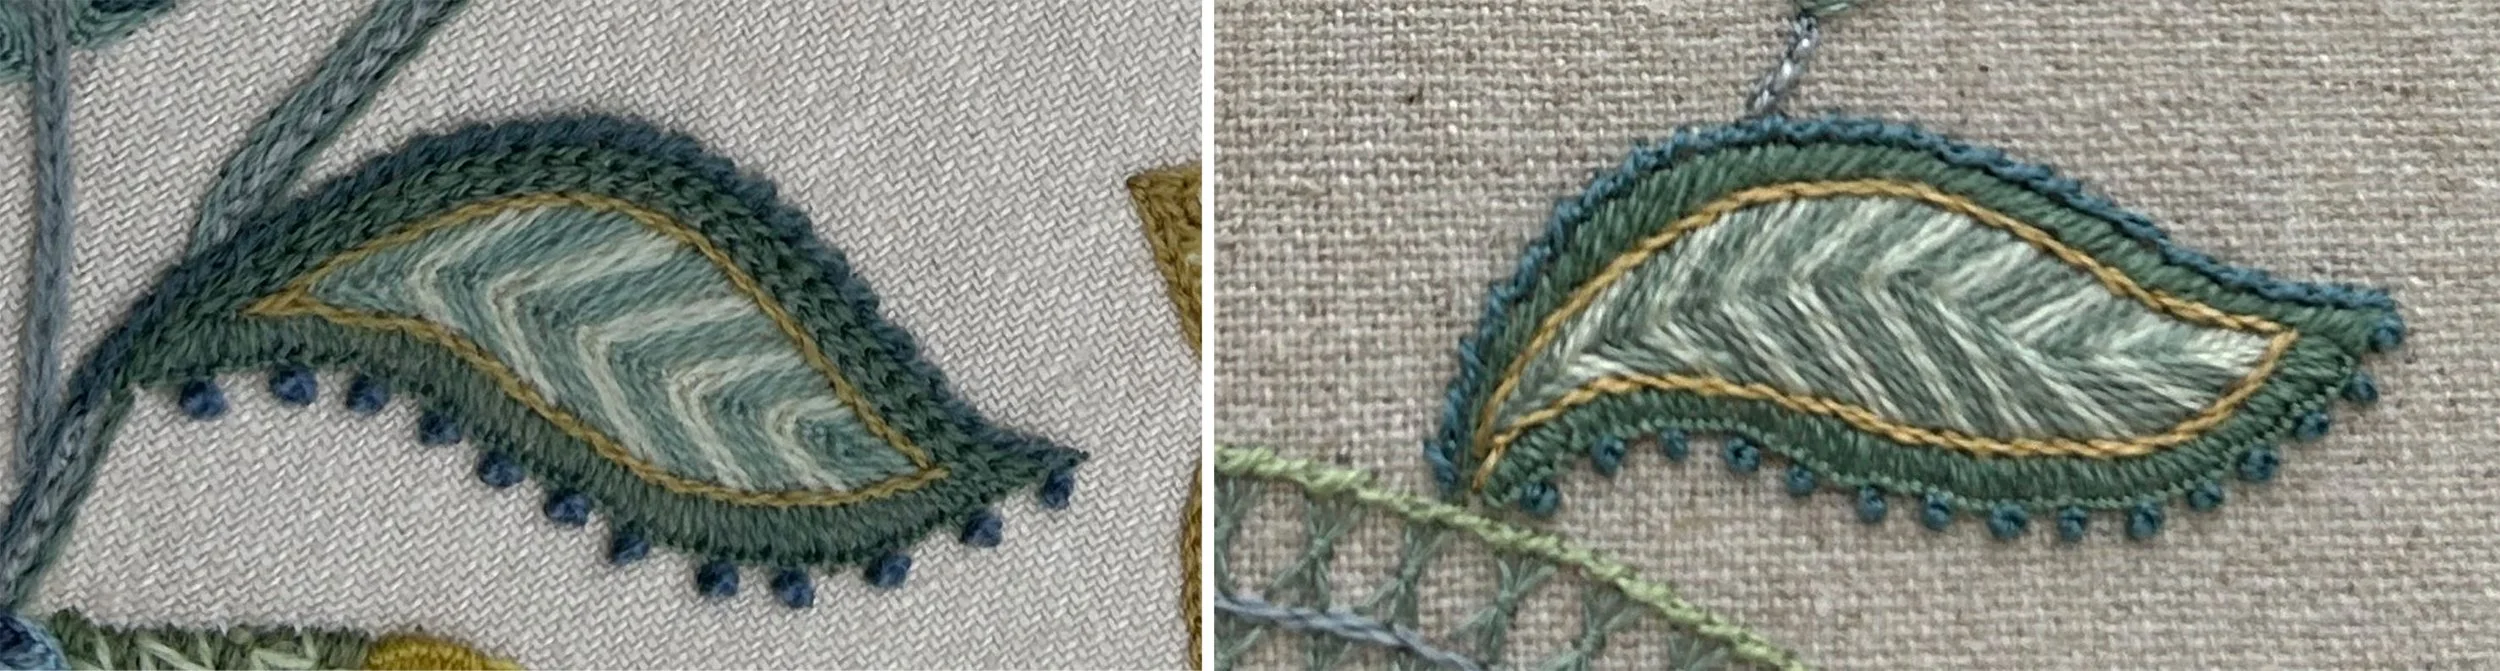
Left - crewel wool. The stripy section of the leaf is stitched with fly stitch. Right - stranded silk. The stripy section is stitched with fishbone stitch to create a smooth centre line.
I did use fly stitch for the bird’s tail in both pieces. I am seriously contemplating undoing the tail on the silk version and restitching it in fishbone stitch because I think the small dots formed down the middle of each feather make it look too busy. We’ll see….
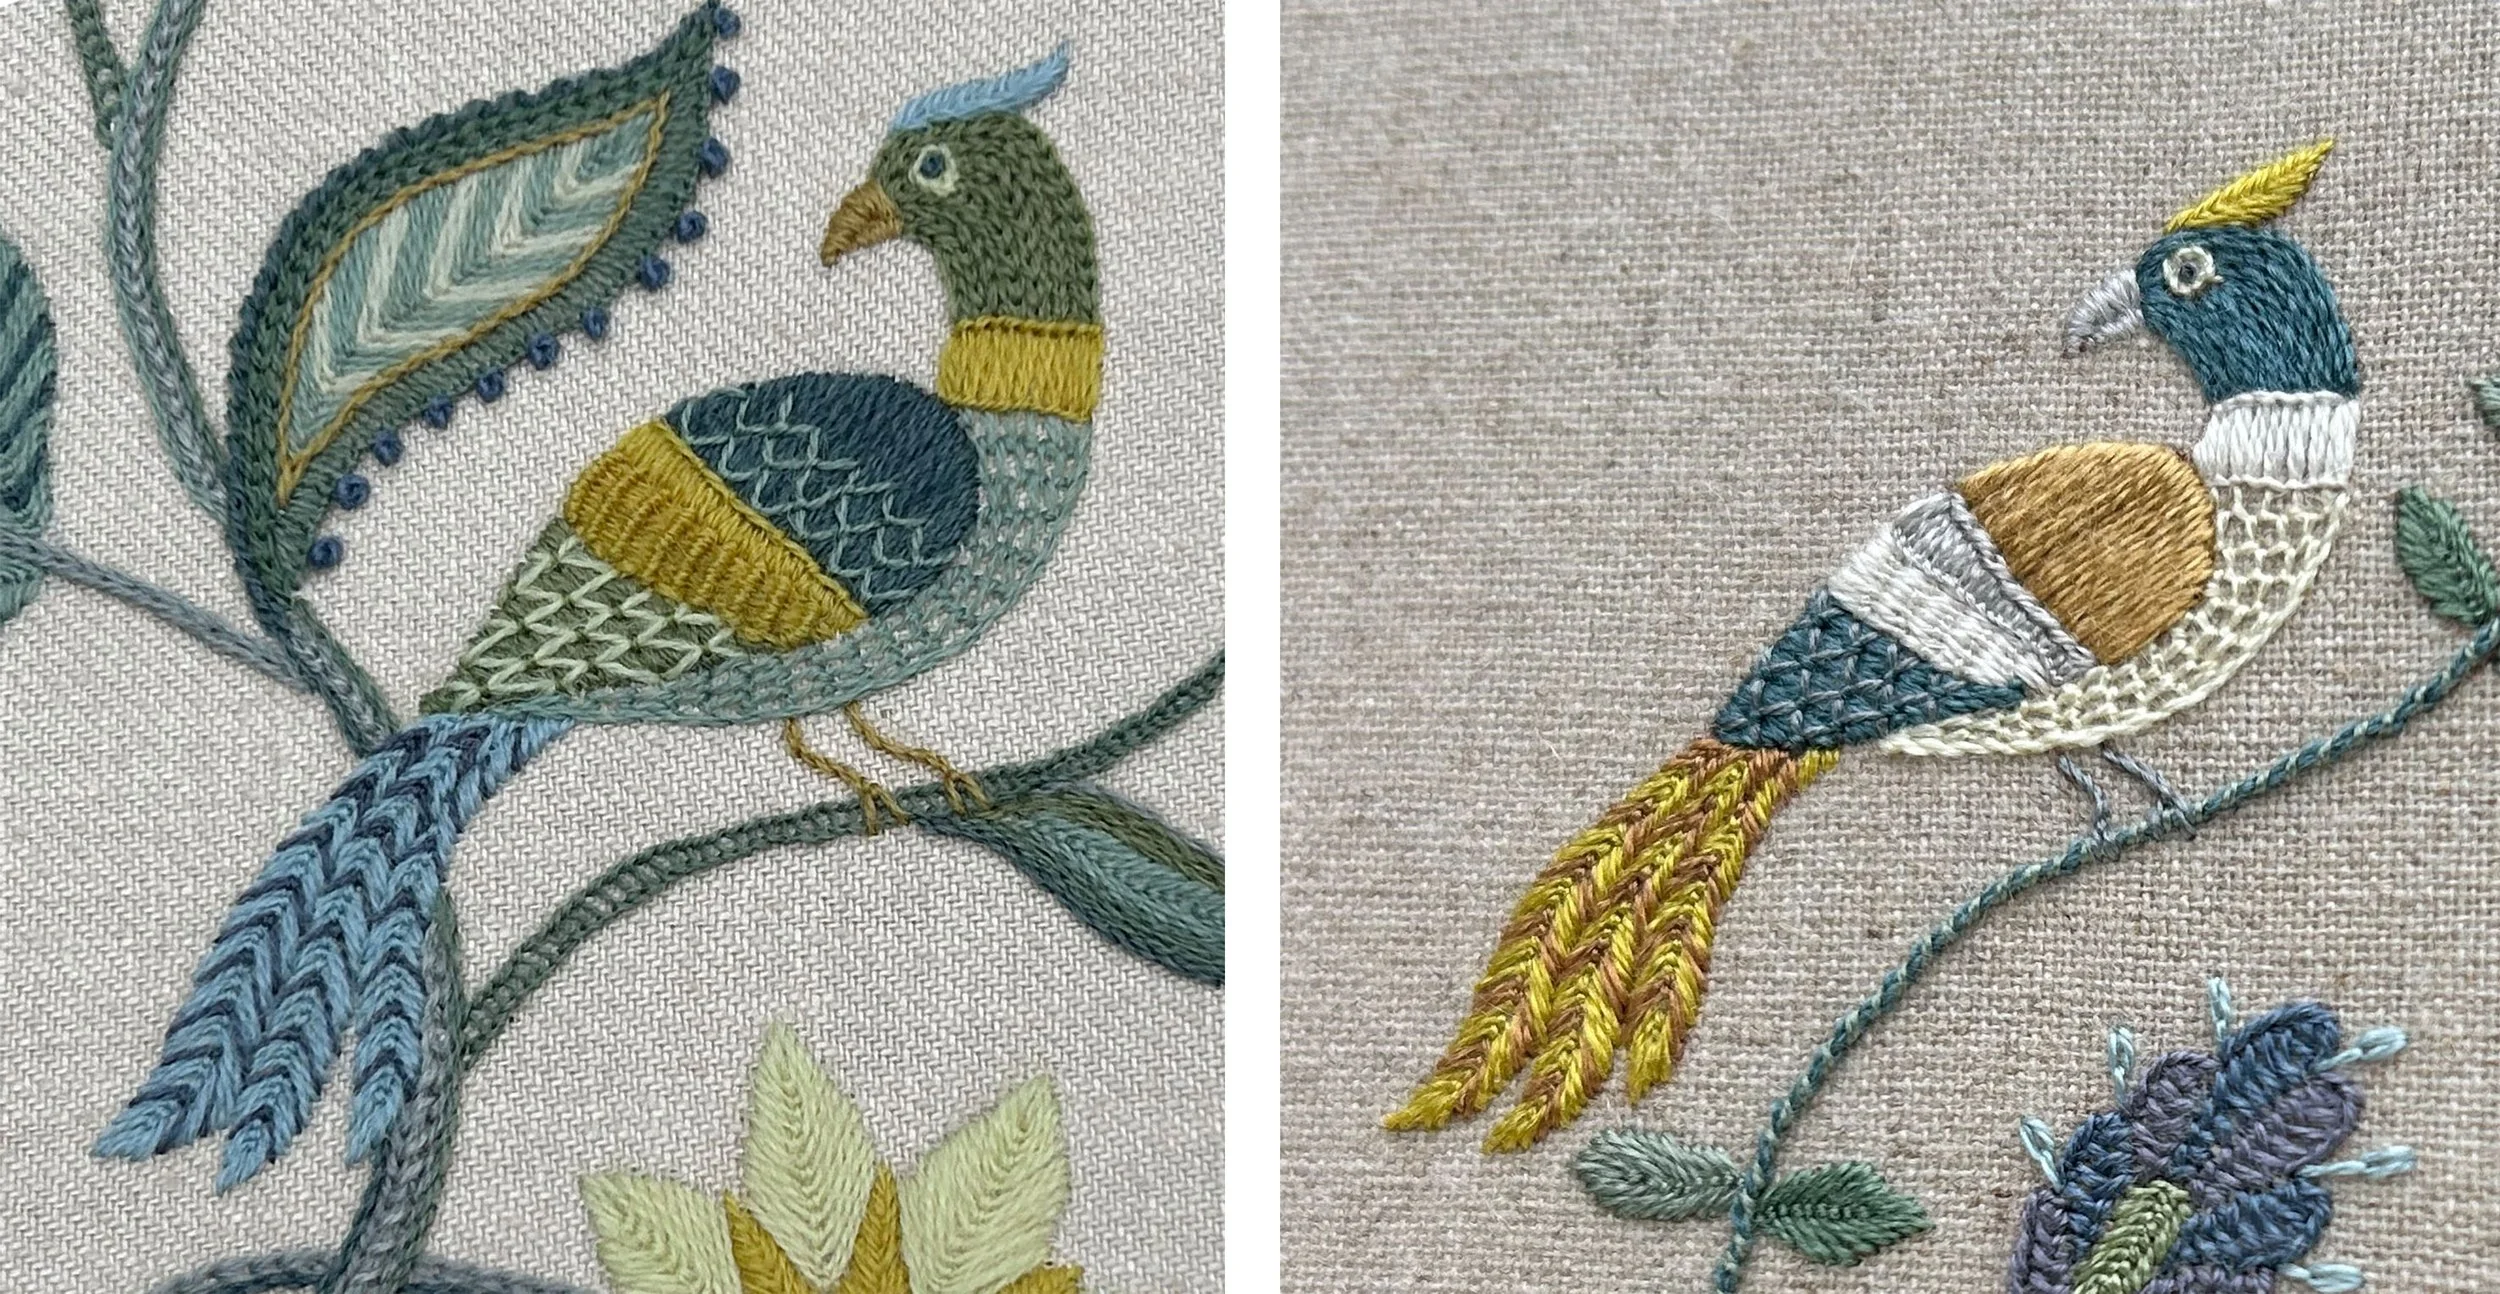
Left - crewel wool. Right - stranded silk. Same stitches (almost), different colours.
So to sum it up: I learned that silk may not be ideal for textured stitches and fillings. I had never really thought about it before, but now, when I think about it, I usually don’t use textured stitches much when I work in silk. The reflection of light off the threads means any texture is easily lost.
Try This
I have created a sheet with a small design and suggestions for threads and stitches, if you would like to try something similar. You can download it here: Stitch Sheet
I would love to hear from you if you give it a try.
Next steps: Creating kits
I have started work on all the other bits and pieces that turn a design into an embroidery kit; photographs, detailed writing, drawing diagrams and putting it all together into easy-to-follow instructions.
I will be doing it a little differently this time around. These are the class projects for a week-long retreat in Potsdam in August. Participants will be able to choose to stitch both the flower border and the tree-of-life design in wool or silk (I truly wish I had the time to stitch the flower border in wool myself, but I don’t, and I sincerely hope someone else will).
Writing the instructions for the embroideries is the next step. It will take a little while to turn these designs into kits.
I absolutely love when my designs are tweaked, changed and personalised. I want to encourage that, so I am working on a way to write patterns that provide my usual step-by-step instructions while also offering options and suggestions for variations, so other stitchers can make their own choices. It’s a little tricky, but most things are until we work out how to do it.
With all that computer work lined up, it will be a little while before I have these available in the shop. I will, of course, let you know when we get closer to the time.
What to call them?
Of course, I need a good name for each of these designs. Something that will join them but at the same time, is different for each one. For all of you who have been part of my stitching journey for some time, you know that I sometimes struggle to name a piece.
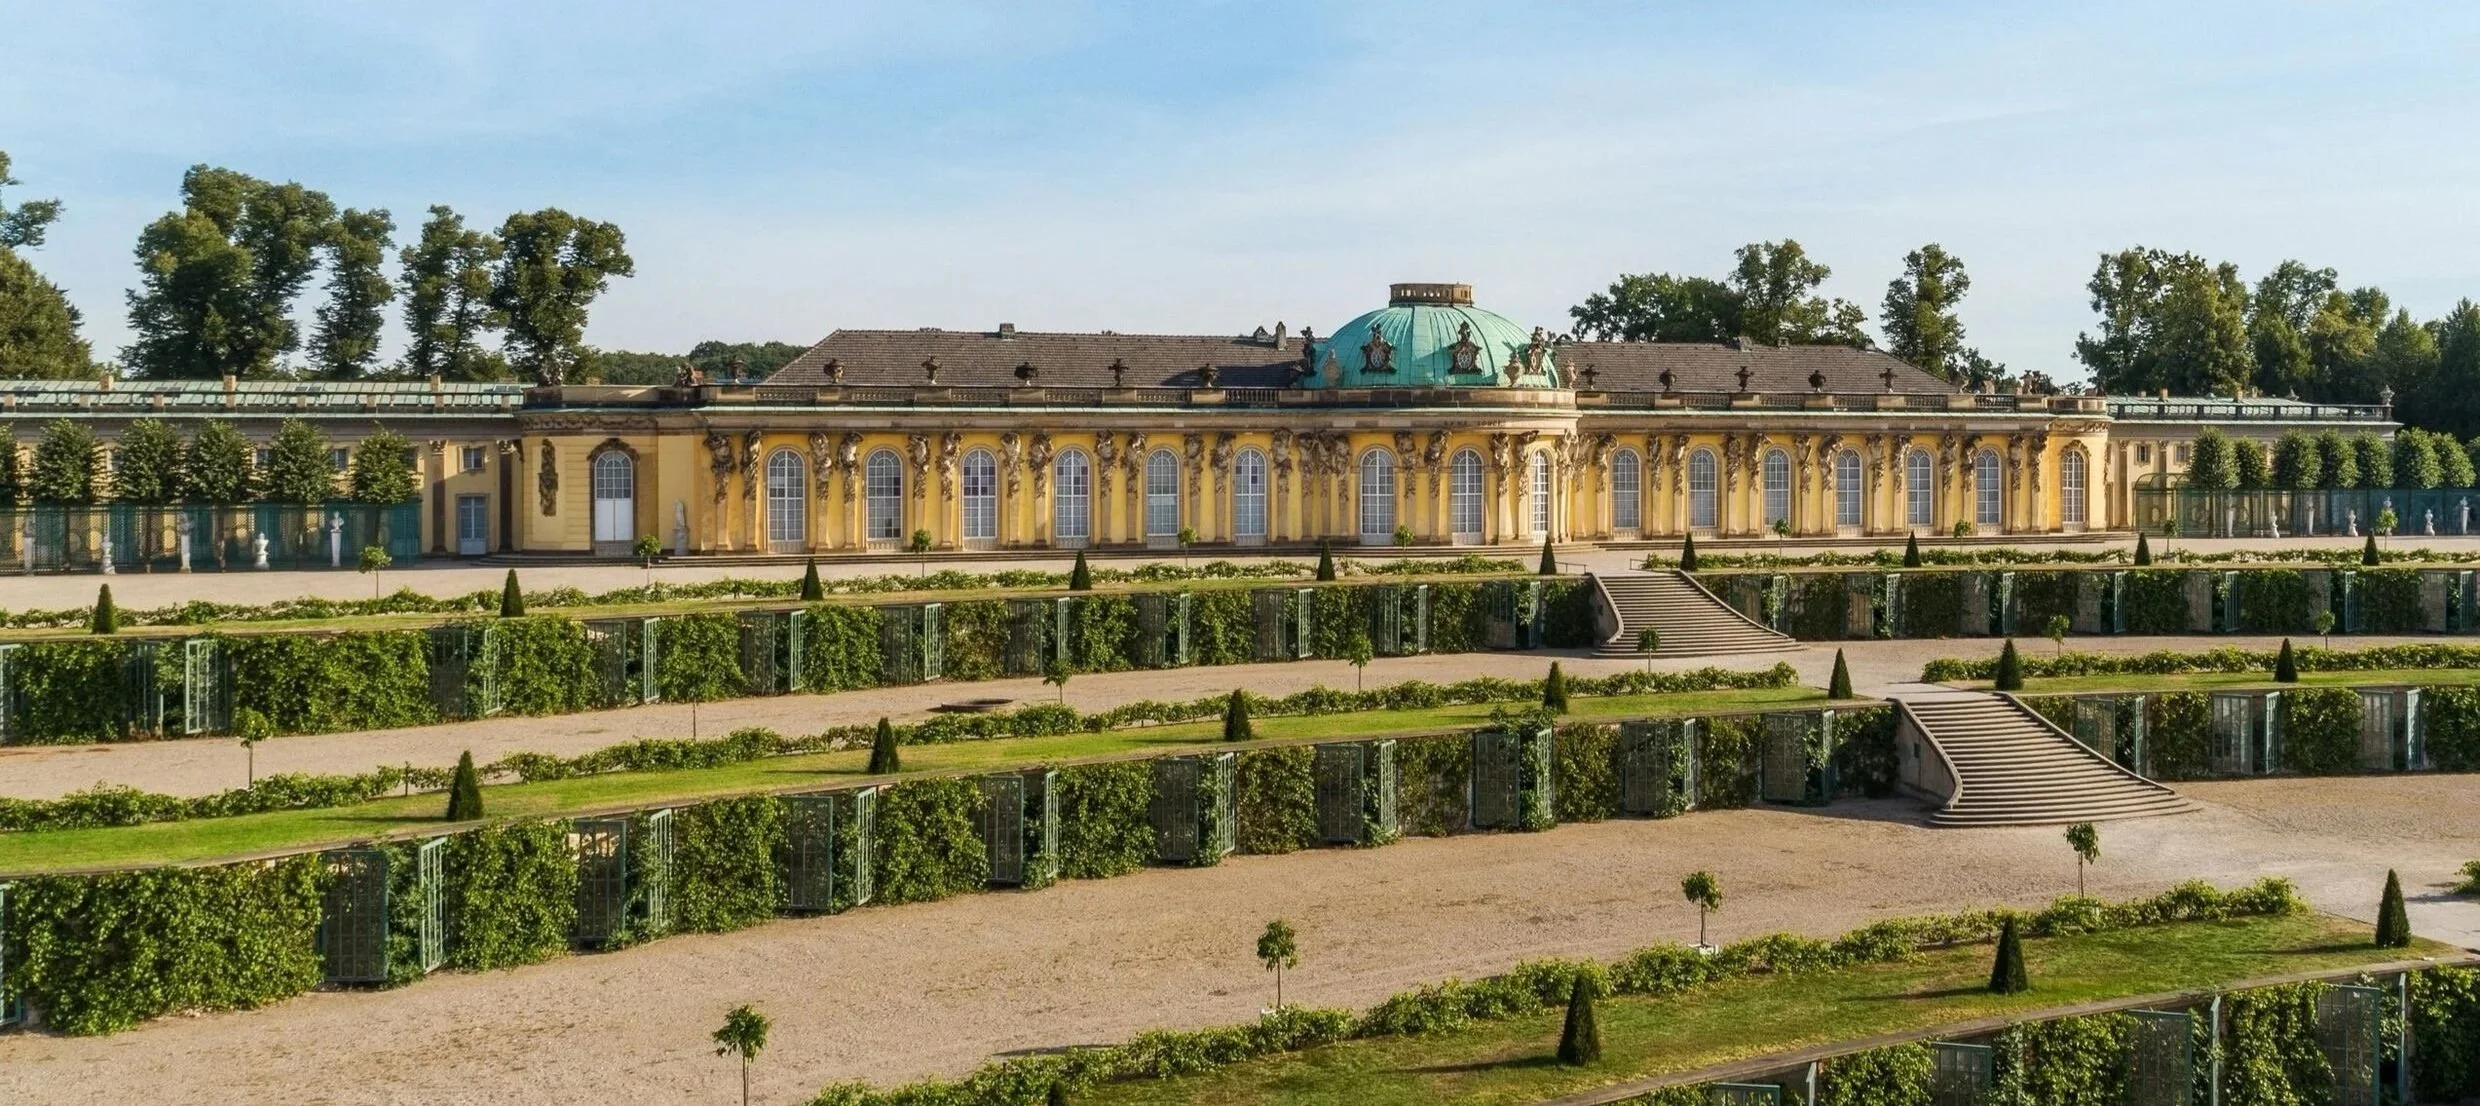
Sanssouci Palace in Potsdam, Germany. Very grand and very opulent. I am looking forward to visiting and seeing it for myself.
See the tiered terraces? I based the shape and texture of the lines below the flower border on them.
While working, I have been referring to the projects as the Sanssouci Tree and the Sanssouci Pond ‘Sanssouci’ because we will be visiting the Sanssouci Palace in Potsdam when I teach the retreat there with Creative Experiences this coming August. I have never been. It looks amazingly grand and opulent, but it was the terraced gardens with espaliered vines, as well as Mark’s (Creative Experiences) vivid description of the flower borders, that sparked the idea for the designs.
I don’t feel any of those names are proper names – more like working titles, and I am having a hard time thinking of something more suitable. If you have any ideas or suggestions, please pop them in the comments below - I need all the help I can get on this one. Who knows, perhaps one of you has the perfect name for one or both of these.
Until next time….